

Big Paper Pumpkins DIY
DIY
$0.00
SKU DIY208
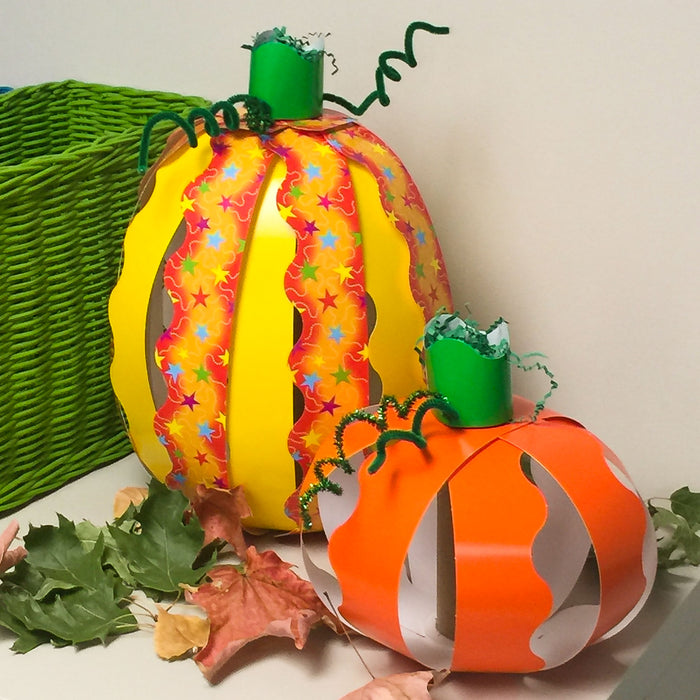
It’s time for pumpkins! Add these large DIY paper pumpkins to your annual fall crafts. They are a joy to make at home with family or with students in a classroom. It's easy to create these as custom or colorful as you like to complete your seasonal decorations at home or school.
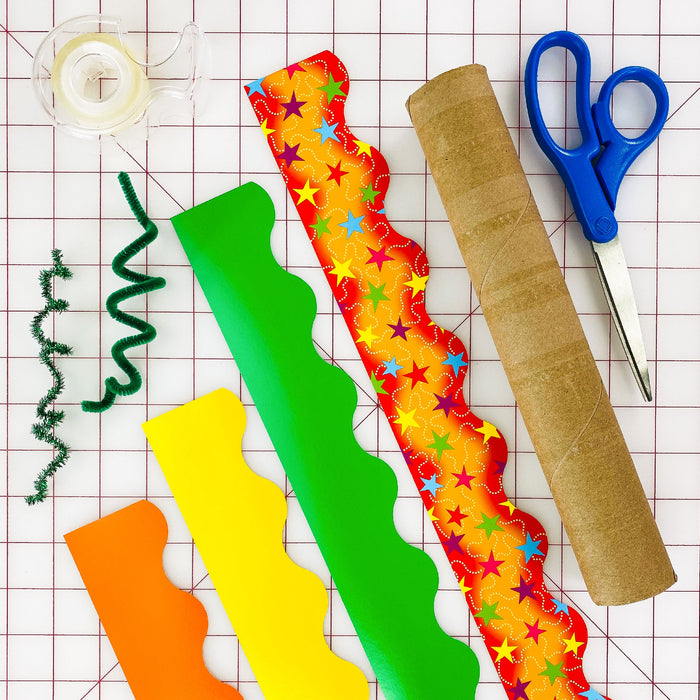
Supplies
- Polka Dots Orange Terrific Trimmers® T92662
- Stars ’n Dots Terrific Trimmers® T92360
- Orange Terrific Trimmers® T9880
- Yellow Terrific Trimmers® T9876
- Green Terrific Trimmers® T9875
- Chenille stems, crinkle-cut paper, cardboard tubes
- Tape and scissors
Directions
We love to mix a variety of patterns and shades of orange and yellow for really joyful and bright Halloween and fall decorations. Have fun!
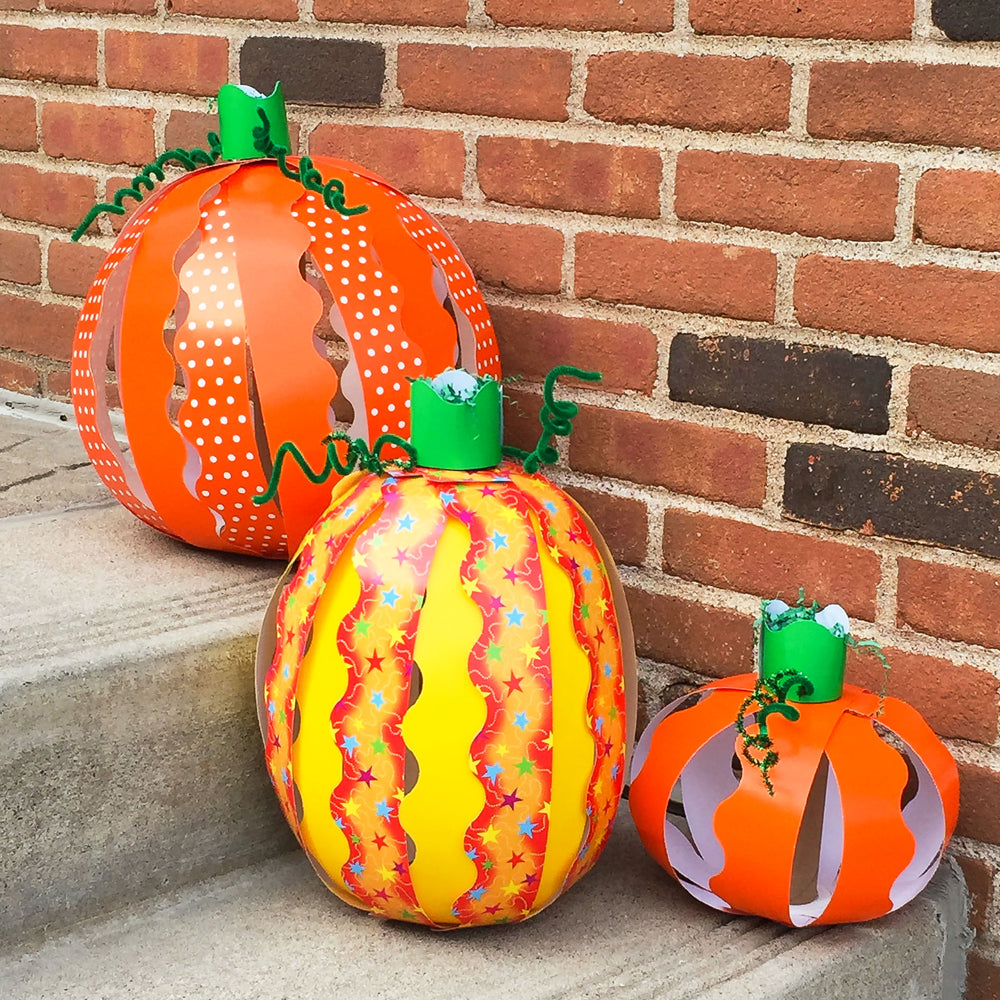
- Use at least six full-length trimmers for each large pumpkin. If you'd like a more layered look, cut extra strips and add them into your assembly. For smaller pumpkins, use shorter strips.
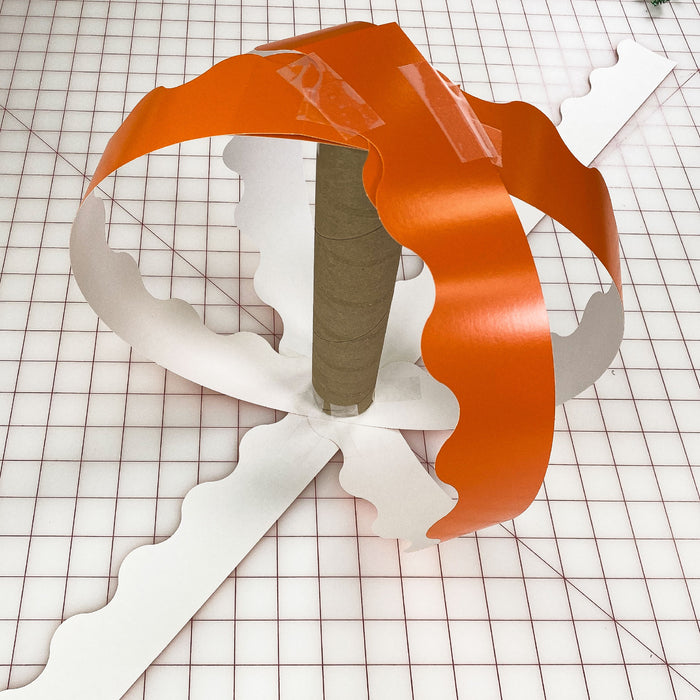
- First, crease each strip slightly to find its center.
- Place three strips face down, evenly spaced, with centers overlapping. Tape them together in the center to hold.
- Join the ends of each strip in the center (making a loop) and tape the ends together. Repeat for three strips so your pumpkin starts to take shape.
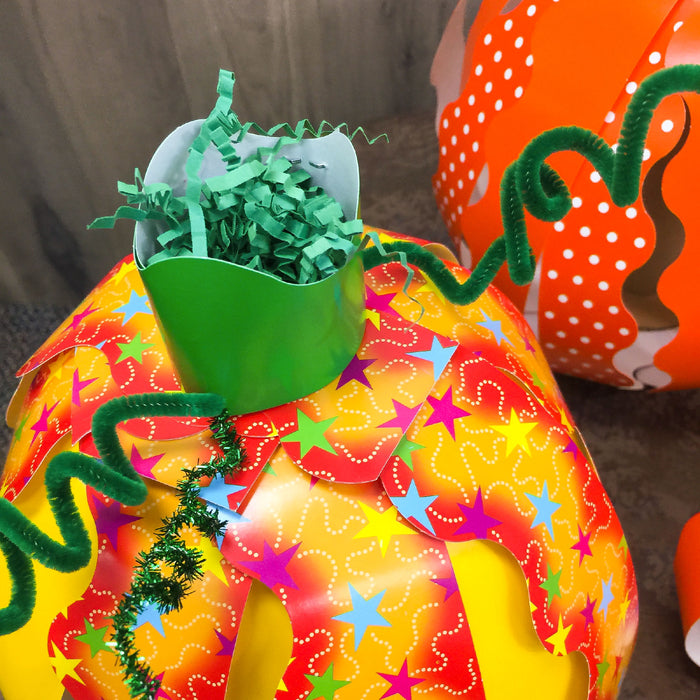
- Next, insert a cardboard tube into the center of your pumpkin and tape it in place. This will help hold support your pumpkin and hold its shape so it is sure to last through the season. Worried about wind? Add small river rocks or other weighted objects inside the tube (fill, and then tape the ends shut before adding).
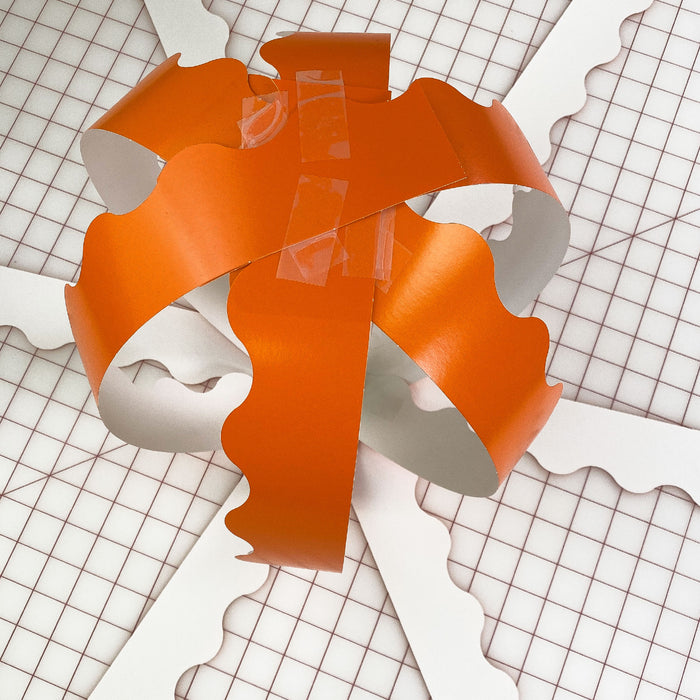
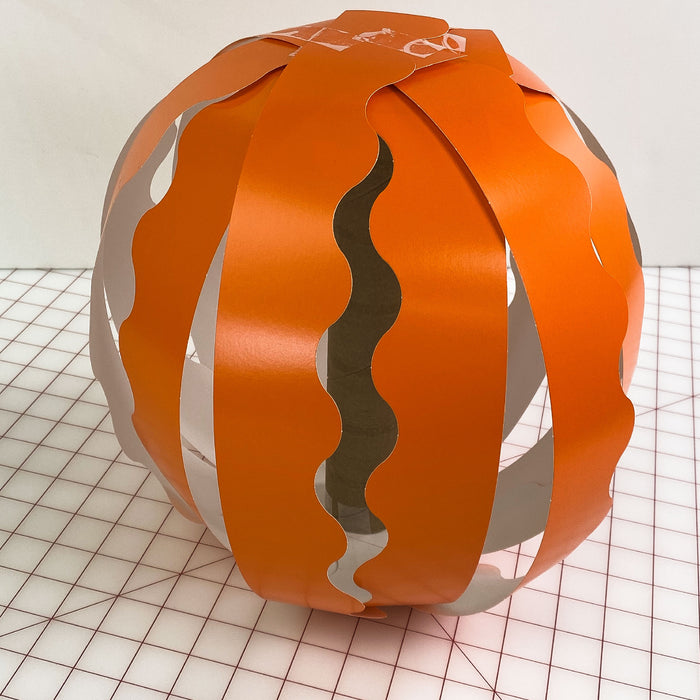
- Continue looping the rest of the trim strips and taping to fill in your pumpkin.
- Create a loop from a short strip of green trim and tape together. Punch a hole on each side (for the vines) and tape to the top of your pumpkin.
- Curl chenille stems. Push one end into the green trim stem at the top of your pumpkin. Tape to hold.
- Fill your stem with crinkle-cut paper.
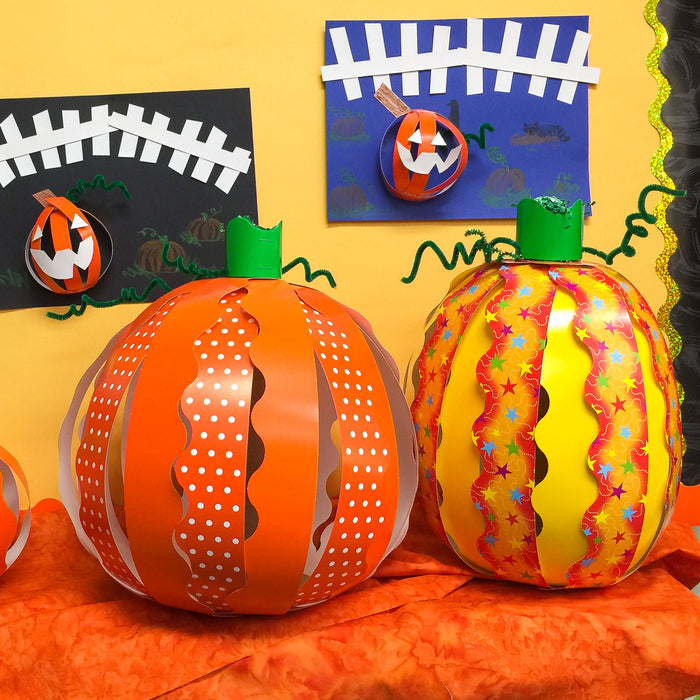
Let this paper pumpkins DIY inspire you to decorate your home, office, and classroom for the season. They are easy as pie to craft yet make a big impact on your fall decorating theme.
©TREND enterprises, Inc. 208
